
 Screenprinting Equipment From Catspit Productions


Learn How To Screen Print With Catspit Productions, LLC
Proper Emulsion Performance Through Mesh Care And Preparation
One of the most overlooked steps in the screen making process is mesh preparation. Amazingly enough you will find experienced screen printers as well as beginners who either skip this step entirely or do not complete this part of the screen making process completely or thoroughly. This is an unfortunate oversight in that proper mesh preparation can reduce wasted time in fixing pinholes or remaking new screens due to poor emulsion to mesh adhesion. When mesh adhesion is critical for high detailed designs, your mesh preparation procedures can help you get the stencil you want and need for good performance on press. It can also prolong the life of the mesh when done correctly.
 There are basically two main reasons that screens should be prepared well before applying emulsion. The first is pinholes and this is a consideration every time you get any screen ready to coat. The second would be emulsion to mesh adhesion. This is most critical with new screens which have fresh, unused mesh. Therefore, it can be said that there are two types of mesh prep that may be done for two different types of screens in the print shop; mesh prep for used screens being used again and mesh prep for brand new screens which have never been used. Without getting technical, let's take a look at each type of mesh prep and how they differ in helping emulsion perform properly.
Damaged mesh or very old mesh can be difficult to clean due to the meshes ability to hold ink and emulsion in the frayed fibers of the worn fabric. Therefore, it is always prudent to take care when you are cleaning mesh in any way. That goes for haze removing and the mesh prep itself. Ultimately the cleaner you can keep the fabric the better the emulsion will adhere to the mesh and thus perform properly.
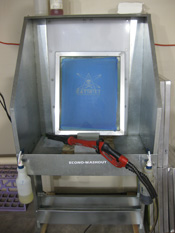
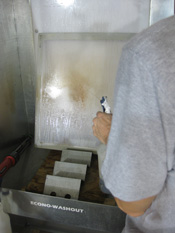
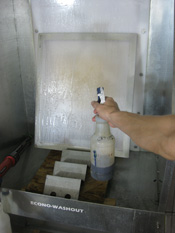
In order to remove emulsion effectively from the screen mesh a combination of physical force and chemical breakdown is needed. The chemical breakdown is completed by the re-claimer or emulsion remover. The chemical is most often applied to the screen with a spray bottle being sure to get the product onto the emulsion coated screen. Sometimes it is suggested to lightly scrub the screen with a screen brush. However, excessive brushing may also wear the mesh so this is only recommended when needed. If you use a brush at all make sure it isn't too abrasive.
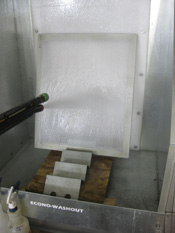
The emulsion remover should be sufficient to do the job in combination with the physical force. The force needed to remove emulsion from the mesh is provided by water and a pressure washer. This will allow you to remove the emulsion with minimal damage to the mesh. But extreme force from a pressure washer can damage the mesh fibers as well. It can also move the fibers and distort the mesh openings.
 Removing ink stains or "haze" is important for excellent emulsion performance. Use a gentle haze remover to assist you in the event you see any staining in the mesh from inks or even emulsions. The pressure washer will aide in the removal of stains too. Be careful again not to damage the mesh with harsh haze removers by leaving them on too long. In the end be sure that your mesh is free and clean of any ink stains and emulsion left behind from previous usages. The gentler you can achieve this, the easier it will be each time it is repeated. It will also allow you to reuse the mesh longer. Once the screen is clean and clear of ink stains and emulsion, proceed to degrease the mesh thoroughly.
Preparing brand new screens so the mesh can be used for the first time - When preparing a brand new screen for the first use things need to be done a little differently keeping the same principles in mind. This will require only three steps: abrade, degrease and drying. Here you want to get the new mesh ready to receive the emulsion well. New polyester screen mesh fibers are pretty slick and smooth. Therefore it is desirable to rough them up slightly so the emulsion has something to bite on. This will increase emulsion to mesh adhesion greatly. Otherwise, burning a stencil with new non abraded mesh can prove to be difficult especially with high detail. To achieve proper abrasion of the mesh fibers it is recommended to use a product specifically designed for this purpose.
There are mesh prep products that include very mild abrasives and even wetting agents. Mesh prep products with abrasives should only be used once on brand new mesh. If you do things on a shoestring budget please note that Comet, Ajax and other household cleansers will abrade the mesh but they have abrasive particles much bigger than that of a screen printing product designed for mesh abrasion. That can cause over abrasion and actually end up damaging the mesh. You simply want to rough the smoothness out of the fiber, slightly being careful not to prematurely wear the mesh.
 Remember, if you are prepping an older screen that has been reclaimed, then you simply want to degrease it after thoroughly removing ink and emulsion residues. Do not abrade used mesh when prepping it for emulsion coating. Again be careful that any brushes used on the screen mesh are not too rough and abrasive. You should be able to use very light agitation of the mesh degreaser in combination with the pressure washer to thoroughly remove dirt, dust, grease and debris from the mesh fibers. The better the reclaiming and de-hazing job you do on older screens the better the emulsion will work for you in screen making or even on press.
Also keep in mind that dust in the area of screen drying can adversely affect your mesh preparation. If dust, dirt, debris or oils get on the screen after the mesh prep or after coating with emulsion, it will cause the efforts of cleaning the mesh to be negated. Be wary of fans or other drafts that might carry dust onto the screen at any point in the screen making process. If you use a homemade wooden screen rack of any kind, be sure to sand it out and paint it well to eliminate loose wood particles. There is one more detail to be aware of that can cause you problems.
If you have just bought a brand new pressure washer it is often the case that it will need to run for some time before the oil and lubricants from the manufacturing are completely out of the unit. So if you try to use a brand new pressure washer to prep screens for coating with emulsion, it is very likely that you will simply put oil and grease on the screen with it. You certainly don't want to do that. You may have to use your garden hose for a while as you break in the pressure washer.
 Taking care to be thorough and gentle when preparing screens to coat or re-coat with emulsion will help the emulsion perform as it should. Pinholes, emulsion adhesion and stencil breakdown on press is greatly affected by the cleanliness of the mesh fibers themselves when the screens are coated with emulsion.
Cleaning your screen mesh gently during the screen making process may also extend the life of the mesh. Often experienced and beginning screen printers alike forget that the screen is to be specially prepared and handled for screen coating purposes. But the rewards of such detailed efforts are definitely worth it.